Why a Demonstration Makes a Process Easier to Follow
A clear demonstration makes a process easier to follow by showing sequence, decisions and checks, so learners can later describe and practise it.
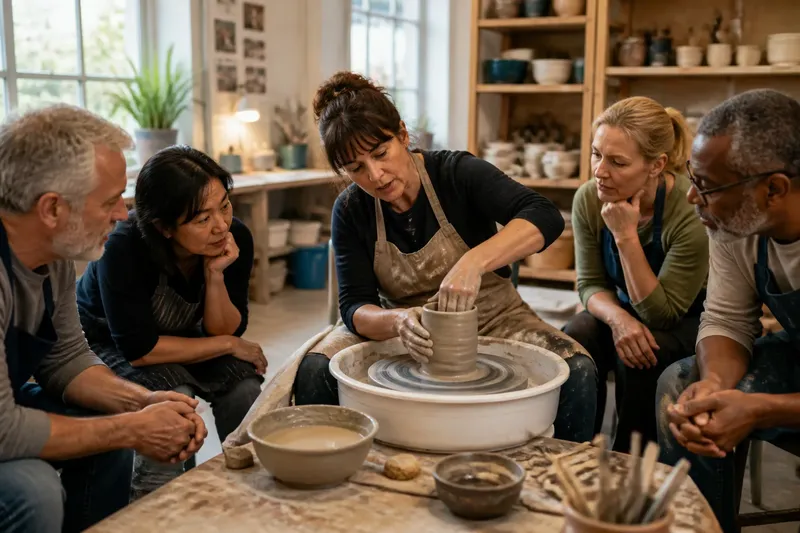
A demonstration makes a process easier to follow when learners can see what happens between the named steps. In an adult learning class, watching someone prepare a lino-cut print, use a spreadsheet filter or shape a piece of clay can reveal the small decisions that written instructions leave implicit. The useful question is not simply whether to demonstrate, but how much of the process to show and when to invite learners to try it.
A demonstration gives the group a shared sequence to inspect. Learners can notice where a hand pauses, what changes when a tool meets the material, and how the demonstrator checks the result before moving on. That makes it easier to ask precise questions and later explain the process in their own words. The teacher’s task is to make the thinking visible without turning the session into a performance in which everyone watches politely and remembers little.
What does a live demonstration make visible?
Instructions often name the main actions but skip the transitions. “Trim the edge” does not show how firmly to hold the ruler, how to keep fingers clear, or how to tell whether the cut is straight. A live demonstration can show those details in context, including the points at which the learner must make a judgement rather than follow a fixed movement.
The sequence also gives learners a mental reference. They can connect an action to what came before and what should happen next, rather than memorising disconnected tips. A simple analogy is a row of labelled drawers: the labels help, but seeing which drawer opens before another makes the arrangement easier to use.
Demonstrating does not remove the need for questions. It gives questions something concrete to attach to. “Why did you turn the fabric before making that cut?” is more useful than a general request for questions while the tool remains in its case.
Which demonstration format suits the task?
Three approaches are useful in community classes and informal skills sessions. They differ in how much of the task learners see at once and how readily they can interrupt.
Should you show the whole process first?
A complete run-through suits short tasks with a clear beginning and end, such as folding a paper form or applying a basic spreadsheet sort. Learners first see how the parts fit together, then the teacher can repeat difficult sections more slowly. The drawback is that small details may pass unnoticed during the first viewing.
Is a stop-and-explain demonstration better?
Pausing at decision points suits tasks with several choices, such as choosing a suitable brush for a paint surface or deciding which spreadsheet column to sort. The teacher can name the clue behind each choice and invite questions before proceeding. Too many pauses, however, can break the sequence into isolated fragments.
When should you demonstrate one stage at a time?
Stage-by-stage demonstration suits tasks with a tricky movement or a result that is hard to reverse, such as forming a clay join. Learners watch one part, clarify what they saw, and then attend to the next. This format is less useful if the group has not yet seen how the stages combine into a complete process.
Say a tutor is showing adults how to use a paper guillotine for a small collage project. If the learners have not seen the task before, the tutor might begin with a brisk complete run-through so they can see the finished sequence. The tutor could then repeat the alignment and cutting stage slowly, point out the safety guard, and ask learners what they would check before lowering the blade. The observable result to look for is whether learners can describe the order and name the check, not whether they can recite the tutor’s exact wording.
How should learners take part while watching?
Watching is only one form of participation. Before beginning, the teacher can tell learners what to notice: the order of actions, a choice made along the way, or the sign that a stage is complete. A focused prompt gives attention somewhere useful to land, especially in a shared room where sightlines and background conversation may compete.
Questions work best at natural pauses. For a pottery demonstration, the teacher might ask what has changed in the clay’s shape or why a tool is being set aside. For a computer task, the group might identify which menu selection changed the visible result. These questions check whether learners can connect an action with its purpose, rather than merely naming what the teacher held.
After the demonstration, ask learners to describe the sequence in their own words before offering another explanation. Their account can expose a missing link: perhaps they know how to begin and finish but not when to check the surface or save a file. A teacher can then return to that point instead of repeating the whole performance.
How can a demonstration prepare learners to explain a process?
A demonstration becomes more useful when it includes words for the decisions as well as the movements. The teacher might say, “I am checking the edge against the guide before cutting,” rather than silently adjusting the material. This names the reason for a pause and gives learners a phrase they can adapt when describing the task themselves.
Keep that language plain and specific. “Make it right” tells a beginner little; “check that the paper sits against both guides” points to something visible. If a tool has several settings, name the one being used and explain what feature of the task makes it suitable. Learners can then distinguish an essential decision from a preference in the teacher’s personal style.
A useful follow-up is to ask one learner to narrate a stage while another observes. The narrator practises ordering and explanation; the observer can say where a step was unclear. This is not a contest over who remembers most. It is a way to see whether the demonstration supplied enough landmarks for someone else to retell the process.
How do you choose the right format for your class?
Choose the format by considering the task, the group and the room. A familiar process with few decision points may need only a complete run-through. A process with a meaningful choice benefits from pauses that make the choice visible. A delicate or unfamiliar movement may call for one stage at a time, followed by a view of the full sequence so learners do not lose the larger picture.
- Check the task’s branching points: if learners must choose between options, pause and explain what guides the choice.
- Check how easily a stage can be reversed: if a mistake changes the material or result, isolate that stage and show the relevant check before proceeding.
- Check what learners already know: a group familiar with the tools may prefer a full sequence, while newcomers may need a closer view of key movements.
- Check visibility: arrange the work so hands, screens or materials can be seen from the group’s seats, or repeat the movement from a clearer angle.
- Check what learners need to explain afterwards: include the names of tools, actions and decision points they will need to describe.
In a small community workshop, a teacher may be able to gather learners around a table; in a larger classroom, a document camera or projector can make fine movements easier to see. The format should serve the process rather than the teacher’s preference for a particular tool. If a live demonstration is difficult to view, a clear prepared image or close-up recording may support it, but learners still need a chance to ask about the choices behind the action.
For a demonstration to make a process easier to follow, make its sequence visible, name the judgement points and leave room for learners to restate what they saw. The right format is the one that helps this group notice the parts they will need to do and explain later. A brief pause for learners to describe the next action can reveal more than another polished run-through.